Unit 20 - Sentinel downloader
Create a new mapset in jena-region project: sentinel.
Important
Do not use dashes in the mapset name otherwise t.rast.algebra will most probably fail.
There are plenty of libraries or tools which allow downloading Sentinel products.
For GRASS there are the i.sentinel toolbox. It consists of six GRASS addon tools:
The addon can be installed by g.extension or from the main menu .
g.extension extension=i.sentinel
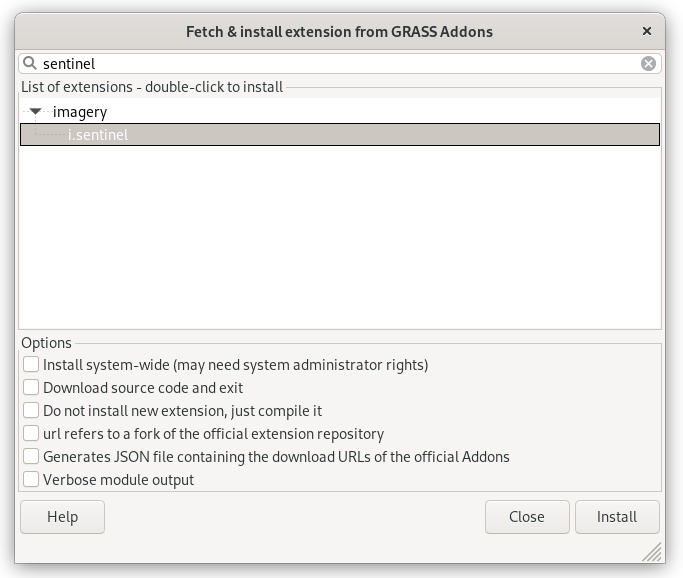
Fig. 107 Install i.sentinel GRASS Addon.
Note
Note that i.sentinel.download requires i.eodag and also eodag package to be installed. It can be easily installed from the Console tab by entering the command below.
g.extension extension=i.eodag
python3 -m pip install eodag
Switch to jena-region project which was created in Unit 02 - First steps.
Download data
Let’s download suitable Sentinel products for our area of interest (AOI) and perform the NDVI calculation as described in Unit 05 - Raster processing (implemented as a model in Unit 08 - Modeler or as a Python script in Unit 11 - PyGRASS scripting). AOI region is defined by Jena city region created in Unit 03 - Data Management. Sentinel-2 L2A products will be used to avoid computing atmospheric corrections.
Important
Pre-downloaded Sentinel scenes are available in the
sample dataset (directory sentinel/2019). You may continue
with importing sample data section.
Let’s search for the latest available product by means of
i.sentinel.download. Setting the -l flag, the result will only
be printed. The download procedure will be performed later. In order to
search and download Sentinel products from the Copernicus Data Space Ecosystem,
you have to create an account first. See the manual page of
i.sentinel.download tool for details. Create a new text
file sentinel.txt containing two lines (username and
password).
Note
To get username and password you need to register at the Copernicus Data Space Ecosystem, see Create a new account page for signing up.
i.sentinel.download -l map=jena_boundary producttype=S2MSI2A settings=sentinel.txt
14 scene(s) found.
S2C_MSIL2A_20260120T102341_N0511_R065_T32UPB_20260120T135514 2026-01-20T10:23:41   0% S2MSI2A size_NA
S2B_MSIL2A_20251226T102339_N0511_R065_T32UPB_20251226T124209 2025-12-26T10:23:39  71% S2MSI2A size_NA
S2A_MSIL2A_20251213T102441_N0511_R065_T32UPB_20251213T114209 2025-12-13T10:24:41  75% S2MSI2A size_NA
...
By default the tool returns scenes for the last 60 days. Let’s change the search period setting start and end options. To be sure that our AOI is fully covered by a Sentinel product we also set area_relation option. We will also limit scenes by clouds coverage percentage threshold
i.sentinel.download -l map=jena_boundary producttype=S2MSI2A settings=sentinel.txt \
start=2025-04-01 end=2025-10-01 area_relation=Contains clouds=10
7 scene(s) found.
S2A_MSIL2A_20250427T101701_N0511_R065_T32UPB_20250427T170513 2025-04-27T10:17:01   0% S2MSI2A size_NA
S2C_MSIL2A_20250813T102041_N0511_R065_T32UPB_20250813T160110 2025-08-13T10:20:41   0% S2MSI2A size_NA
S2C_MSIL2A_20250614T101621_N0511_R065_T32UPB_20250614T142405 2025-06-14T10:16:21   2% S2MSI2A size_NA
...
Let’s download the desired scene(s). Just remove the -l flag and add the output option in order to define the path to the output directory where data should be saved.
i.sentinel.download map=jena_boundary producttype=S2MSI2A settings=sentinel.txt \
start=2025-04-01 end=2025-10-01 area_relation=Contains clouds=10 \
limit=1 output=geodata/sentinel/2025
Note
Note all scenes are NOT available online. In this case the tool fails, try to download affected scene in the next days.
Import data
Before importing or linking Sentinel data try to print a list of filtered raster files including projection match (second column, 1 for match otherwise 0). If the CRS of input data differs from the current project consider reprojection (-r) or creating a new project for import.
Data will be imported into the GRASS project by means of the i.sentinel.import tool. The command will import all Sentinel bands from input directory recursively. Before importing data let’s check content of the input directory by -p flag. The import procedure will be limited to the 4th and 8th bands in 10m spatial resolution by pattern option.
i.sentinel.import -p input=geodata/sentinel/2019 pattern="20190626T102031_B0[4|8]_10m"
...L2A_T32UPB_A020940_20190626T102028/IMG_DATA/R10m/T32UPB_20190626T102031_B08_10m.jp2 1 (EPSG: 32632)
...L2A_T32UPB_A020940_20190626T102028/IMG_DATA/R10m/T32UPB_20190626T102031_B04_10m.jp2 1 (EPSG: 32632)
By default, input data are imported into GRASS data format. Alternatively, data can be linked if -l is given. It is also useful to import cloud mask vector features by -c flag.
i.sentinel.import -l -c input=geodata/sentinel/2019 pattern="20190626T102031_B0[4|8]_10m"
Note
Cloud mask is computed by i.sentinel.import, the tool doesn’t use cloud mask product stored in a SAFE directory.
Now launch the NDVI sample script created in Unit 12 - Script User Interface (ndvi-v4.py) in order to compute NDVI classes (see processing workflow described in Unit 09 - Model tuning).
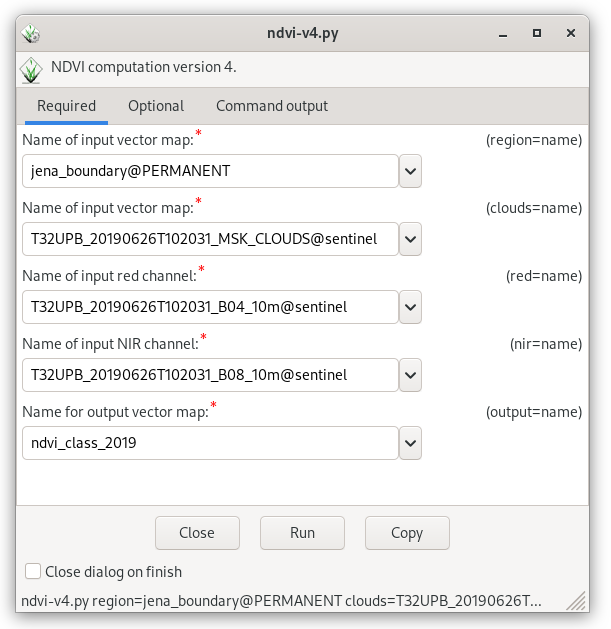
Fig. 108 Run script to compute NDVI classes.
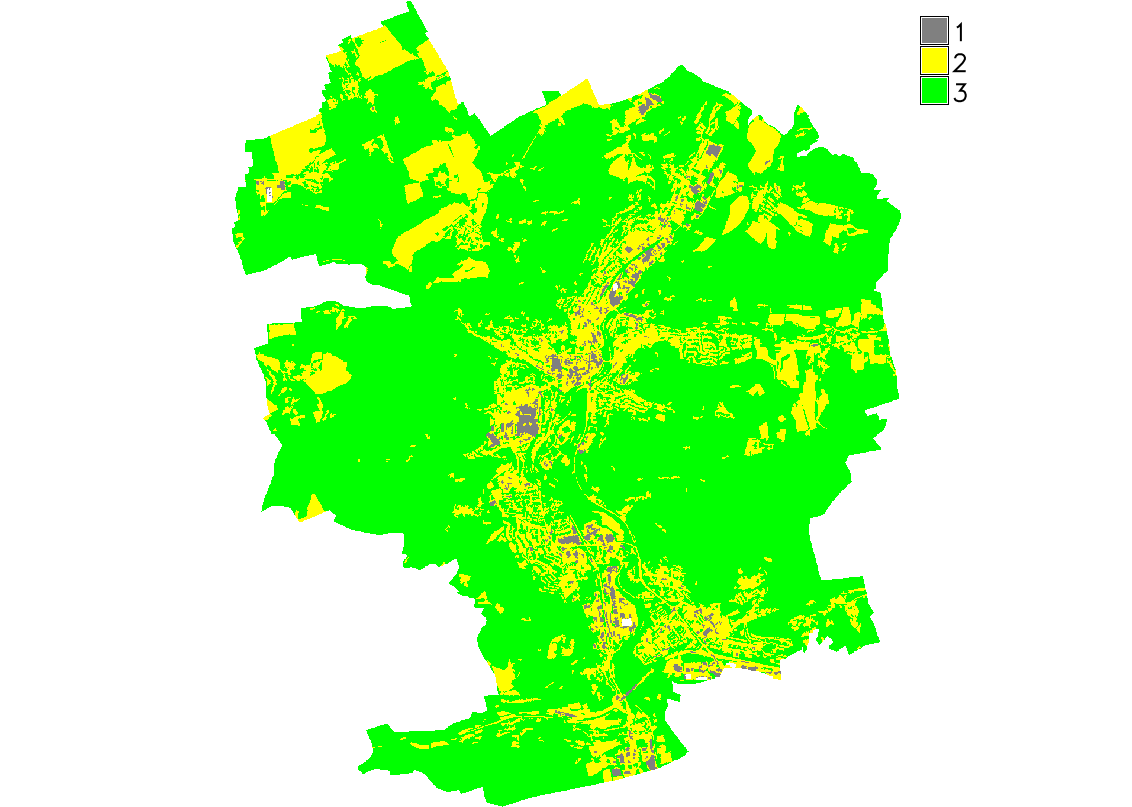
Fig. 109 Computed NDVI classes for given AOI.